Step 2: How to Buy Hosting – In this article, we are going to show you how to buy hosting for your website and domain name, step-by-step. We are going to cover everything there’s to know, so let’s get started.
Back on Godaddy dot com to buy our hosting. Now we are going to sign-in with our previous account with this sign-in button here, click on it. Enter your username and password, you can select keep me sign in and then click on this sign-in button.
Once logged in, you’ll see your previous purchase details, now click on this Godaddy logo to again go to welcome page. Here in menus, click on hosting, in this drop-down list; we are going to select this web hosting option. It will redirect you to this page. Scroll down and you’ll see here different hosting plans with their included features. So here we are going to select this ‘economy’ plan. We’ll click on this add to cart button here, and here it opens, on this page, we are going to select the time period.
#STEP 1: Select your hosting pack

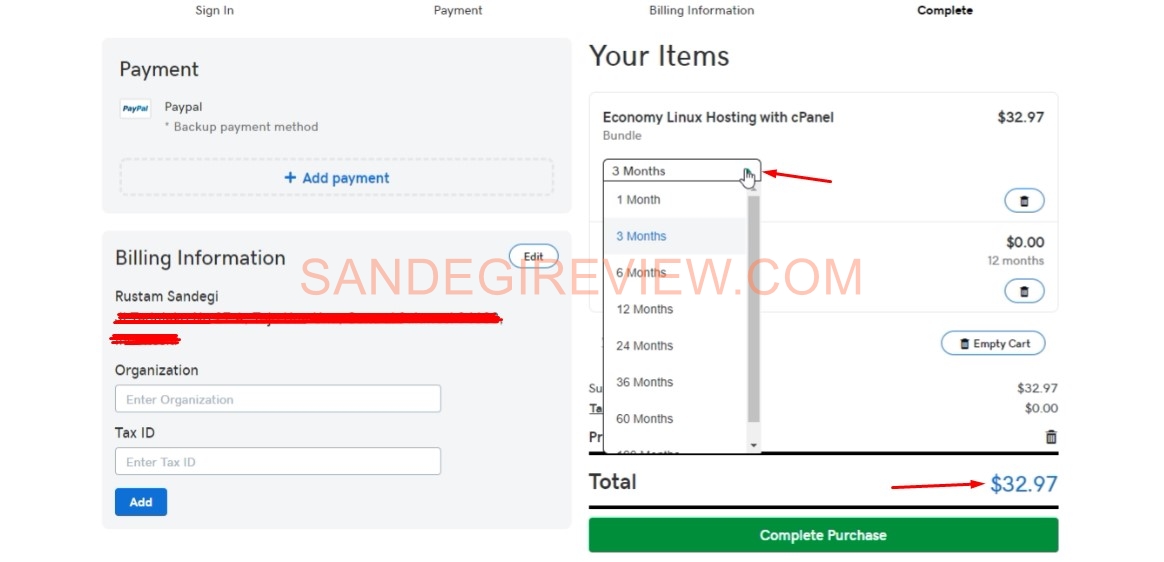
You can buy hosting for three months, twelve months, twenty-four months or even thirty-six months. We are going to select three months hosting plan and on the right side, you can see our billing amount is generated accordingly.

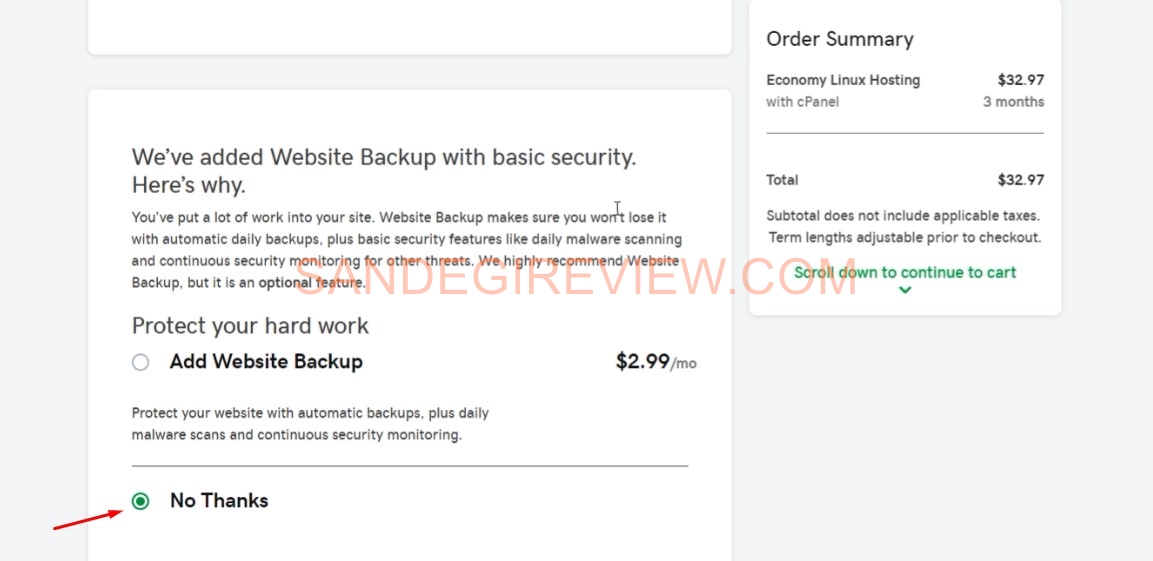
So by default, website backup is added and you can also add other options as well if you want. Whatever you’ll choose, charges will automatically add in your billing amount. So we don’t want website backup and hence we’ll select no thanks option here. You can add it if you want and pay accordingly but for me, it’s not required.
So yes, now I am going to click on this continue button at the bottom and here I am again on the check out page. As previously I have added PayPal, so it is hereby defaulted.

Now you can select the time period for your cPanel. You can choose it accordingly and the longer time you choose the lesser amount you’ll have to pay for one month. I will choose it for one month and there are other options also which you can add if you want. Click on the complete purchase button and here the pop-up came confirming our purchase.
#STEP 2: Payment
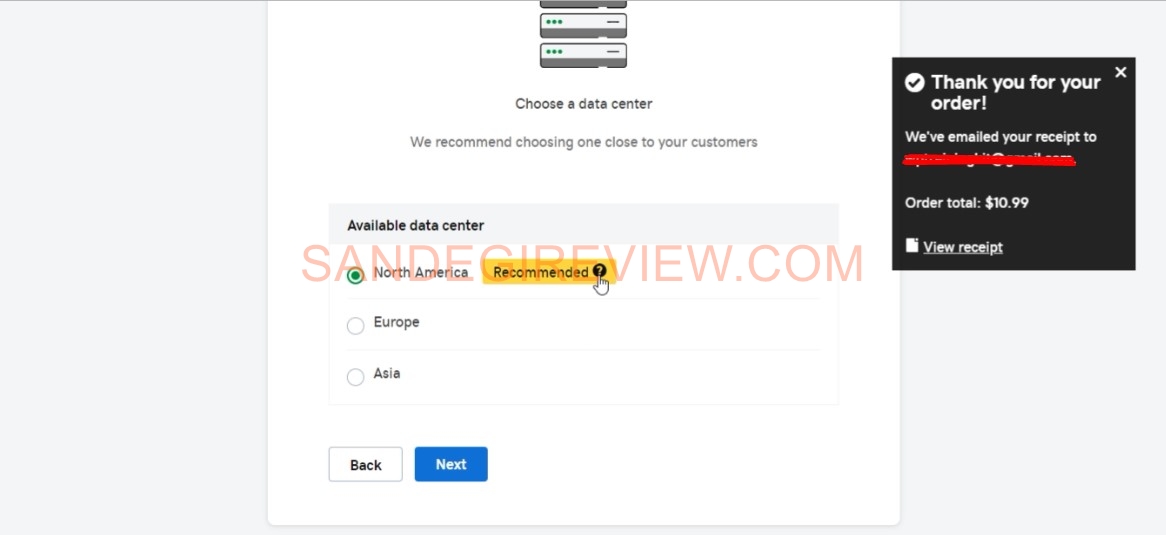
Now we have to select the domain for our hosting, enter your domain name here and click on next. Choose your data center based on your customer base locality. Here it is showing the top one as best recommended, you select it or another one, your choice and click on next. Now it’s asking about creating a WordPress site. You can start the process right away or you can choose not now an option.
#STEP 3: Data Center
We will choose not now and click on next. Then you have to create your mail account. You can choose any name you want, like admin, info or update @ your domain name dot com. I will go with admin and then click on this finish button here. Now the processing has started and you can see its loading. It will take a few minutes here.
Okay, so it’s finished here and you can go to your dashboard by click on this button. And it’s just asking about their customer experience improvement program.


I will select no here and click confirm. Here you can sell all the details, about the RAM, files. You can also upgrade it from here, and your email details. Security options, you can purchase if you want to. And this is your CPanel log-in details here which are important. So here it is, pretty much everything.
Next Tutorial: NameServer
Hi, my name is Rustam Sandegi, I write review content on this blog with all my heart, the articles on this blog are based on personal experience and also personal opinion. Hopefully, the articles on this website are useful. Thank you for visiting my website

